
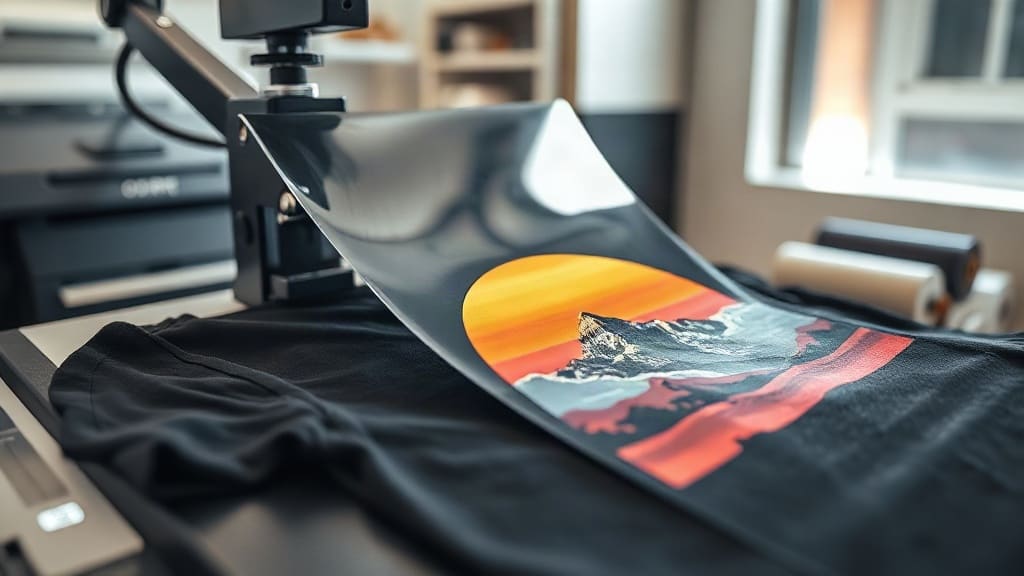
When it comes to custom apparel, DTF transfers have become a game-changer for businesses and hobbyists alike. Unlike traditional methods that require weeding or specialized equipment, DTF transfers streamline the process while delivering exceptional quality. Whether you're printing on cotton, polyester, or blends, this technology opens up a world of possibilities for vibrant, long-lasting designs. In this guide, we'll dive deep into what DTF transfers are, how they work, and why they might be the perfect solution for your next project.
If you've ever struggled with vinyl cutting or screen printing, you know the pain of intricate designs and color limitations. DTF transfers eliminate many of those headaches. They allow you to print full-color, photographic-quality images onto a special film, then transfer them to fabric with a heat press. The result? Professional-grade apparel that stands up to repeated washing and wear. Let's explore the ins and outs of this exciting technology.
What Are DTF Transfers?
DTF stands for Direct to Film. It's a printing method where your design is printed onto a PET film using specialized inks, then coated with a adhesive powder. Once the powder is melted, the transfer is ready to be applied to fabric using a heat press. The film acts as a carrier, allowing the design to be transferred seamlessly onto the garment. Unlike DTG (Direct to Garment) printing, DTF transfers can be used on a wide range of fabrics, including those with high polyester content, without the need for pre-treatment.
The process involves several key steps:
- Design Preparation: Your artwork is prepared digitally, ensuring it's mirrored and sized appropriately.
- Printing: A DTF printer lays down a layer of white ink (for opacity) followed by CMYK colors onto the film.
- Powder Application: A thermoplastic powder is applied to the wet ink, which will later bond the design to the fabric.
- Curing: The film is heated to melt the powder, creating a flexible, durable layer.
- Transfer: The film is placed on the garment and pressed with heat and pressure to transfer the design.
Each step is crucial for achieving a vibrant, wash-resistant result. The beauty of DTF transfers lies in their versatility: you can print on almost any fabric, from cotton and polyester to blends, and even some non-textiles like leather. This makes them ideal for custom t-shirts, hoodies, tote bags, and more.
Why Choose DTF Transfers Over Other Methods?
If you're comparing printing options, DTF transfers offer several compelling advantages. Here's why many professionals are making the switch:
- No Weeding or Cutting: Unlike heat transfer vinyl (HTV), DTF transfers don't require manual weeding. This saves hours of tedious work, especially for complex designs.
- Full-Color and Photographic Detail: DTF can reproduce gradients, fine lines, and photorealistic images with stunning accuracy. You're not limited by the number of colors or layers.
- Works on Multiple Fabrics: Whether you're printing on 100% cotton, 100% polyester, or a 50/50 blend, DTF adheres well. It's also suitable for dark and light garments without needing separate pre-treatments.
- Durability: When applied correctly, DTF transfers are highly resistant to cracking, peeling, and fading. They can withstand dozens of washes.
- Cost-Effective for Short Runs: For small batches or one-off items, DTF is more economical than screen printing, which requires setup costs per color.
- Stretchability: The transfers have some elasticity, making them suitable for stretchy fabrics like spandex blends.
These benefits make DTF transfers a top choice for custom apparel businesses, sports teams, and promotional products. However, like any method, there are nuances to master for optimal results.
How to Apply DTF Transfers for Best Results
Applying DTF transfers might seem straightforward, but following the right technique ensures a professional finish that lasts. Here's a step-by-step guide:
1. Prepare Your Workspace and Garment
Start with a clean, flat surface. Preheat your heat press to the recommended temperature, typically between 300°F and 325°F (150°C to 160°C). While it heats, lint-roll the garment to remove any dust or fibers. Pre-press the garment for a few seconds to eliminate moisture and wrinkles, which can interfere with adhesion.
2. Position the Transfer
Place the DTF transfer film onto the garment with the printed side facing up. If your design has a specific orientation, ensure it's mirrored correctly before printing. Use heat-resistant tape to hold the transfer in place if needed, especially for small pieces.
3. Apply Heat and Pressure
Cover the transfer with a Teflon sheet or parchment paper to protect your heat press. Apply medium to high pressure for 10-15 seconds. The exact time and temperature can vary depending on the film and powder used, so always check the manufacturer's instructions. Too little pressure can result in poor adhesion, while too much can cause the design to spread.
4. Peel the Film
After pressing, allow the transfer to cool completely before peeling. This is known as a cold peel. Peeling while hot can distort the design or leave residue. Once cool, slowly peel the film away from one corner. If any part of the design lifts, press it again for a few seconds.
5. Post-Press for Durability
For added durability, especially on stretchy fabrics, cover the design with a Teflon sheet and press again for 5-10 seconds. This second press ensures the adhesive fully bonds with the fabric fibers. Avoid ironing directly over the transfer, as it can cause sticking or damage.
Following these steps will yield a vibrant, long-lasting print. But even with the best technique, the quality of your DTF transfers matters. That's where sourcing from a reputable supplier like PatchesElite comes in.
Common Challenges and How to Overcome Them
While DTF transfers are user-friendly, some issues can arise. Here are common problems and their solutions:
- Transfer Not Adhering: This often happens due to insufficient pressure, low temperature, or a dirty garment. Ensure your heat press is calibrated and the fabric is clean. Pre-pressing helps.
- Cracking or Peeling After Wash: Usually caused by under-curing the powder or not enough pressure during application. Make sure the powder is fully melted (it should look glossy) and apply firm pressure.
- Color Fading: Cheap inks or improper curing can lead to fading. Use high-quality DTF transfers from trusted sources and follow wash instructions (inside out, cold water, no bleach).
- Film Sticking to the Design: This can happen if the transfer is peeled too early. Always wait for it to cool completely.
- Design Looks Dull: If the white ink layer is insufficient, colors may appear muted on dark fabrics. Ensure your printer uses enough white ink and that the transfer is opaque.
By troubleshooting these issues, you can achieve consistent, professional results. Remember, practice makes perfect, so don't be discouraged by initial hiccups.
DTF Transfers vs. Other Printing Methods
To help you decide if DTF is right for you, let's compare it to other popular methods:
- DTF vs. DTG: DTG prints directly onto the garment, which is great for cotton but requires pre-treatment and can be slow. DTF works on more fabrics and often has brighter colors on dark shirts.
- DTF vs. Screen Printing: Screen printing is cost-effective for large orders but has setup costs and color limitations. DTF excels for small batches and complex designs.
- DTF vs. HTV: HTV requires weeding and layering, which is time-consuming. DTF is faster for multi-color designs and offers more detail.
- DTF vs. Sublimation: Sublimation only works on light polyester fabrics. DTF can be used on cotton and dark colors, making it more versatile.
Each method has its place, but DTF transfers offer a unique blend of versatility, quality, and efficiency that's hard to beat.
Frequently Asked Questions About DTF Transfers
How long do DTF transfers last?
When applied correctly and cared for properly, DTF transfers can last as long as the garment itself. Expect 50+ washes without significant fading or cracking. Always wash inside out in cold water and avoid harsh detergents.
Can I use DTF transfers on polyester?
Absolutely! DTF transfers adhere well to polyester and polyester blends. In fact, they often perform better on polyester than DTG printing, which can have adhesion issues. Just ensure you use a lower temperature (around 300°F) to prevent scorching.
Do I need a special printer for DTF transfers?
Yes, DTF printing requires a dedicated DTF printer that uses pigment inks and a white ink channel. However, if you're not ready to invest in a printer, you can buy pre-printed DTF transfers from suppliers like PatchesElite and apply them with a heat press.
What is the best temperature for pressing DTF transfers?
Most DTF transfers recommend a temperature between 300°F and 325°F (150°C to 160°C). Pressure should be medium to high, and time typically 10-15 seconds. Always follow the specific instructions provided with your transfers.
Can I stretch DTF transfers?
DTF transfers have some stretchability, making them suitable for stretchy fabrics like spandex and elastane. However, extreme stretching can cause cracking over time. For high-stretch areas, consider using a transfer with a higher elastomer content or post-press for added flexibility.
With these insights, you're well-equipped to dive into the world of DTF transfers. Whether you're a business owner looking to expand your product line or a DIY enthusiast, this technology offers endless creative possibilities. For high-quality DTF transfers and supplies, visit PatchesElite.com and explore their range. Your custom apparel journey starts here.