
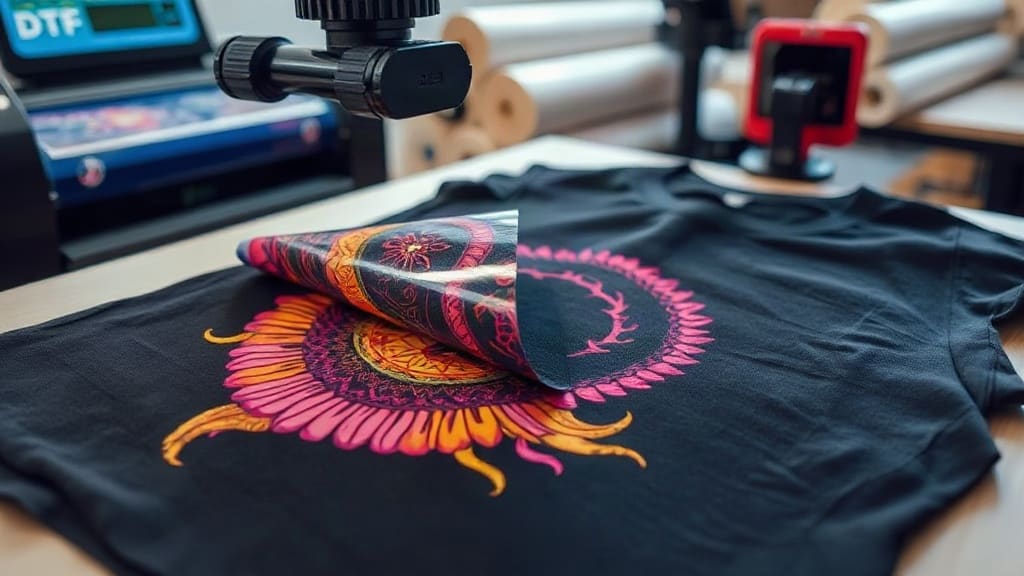
If you've been exploring custom apparel printing, you've likely heard about DTF transfers. This technology has quickly become a favorite among crafters and small business owners for its versatility and vibrant results. Unlike traditional methods, DTF (Direct to Film) transfers allow you to print full-color designs onto a special film, then heat-press them onto almost any fabric. In this guide, I'll walk you through everything you need to know to get started with DTF transfers, sharing insights from my own experience and practical tips to help you achieve professional-looking prints at home.
What Are DTF Transfers and How Do They Work?
DTF transfers are a relatively new printing method that involves printing your design onto a PET film using specialized inks, then applying a powder adhesive, and finally heat-pressing the film onto your garment. The magic happens when the adhesive melts and bonds with the fabric fibers, creating a durable, stretchable print. The process is straightforward but requires attention to detail.
Here's a quick breakdown of the steps:
- Design Preparation: Create your artwork in a graphic design software, ensuring it's mirrored if needed (though most DTF printers handle this automatically).
- Printing: Use a DTF printer with pigment inks to print onto the film. The printer lays down a white ink base, then the colors.
- Powdering: While the ink is still wet, apply a hot-melt adhesive powder evenly over the print. Shake off excess.
- Curing: Melt the powder using a heat source (like a heat press or oven) until it becomes glossy. This activates the adhesive.
- Transfer: Place the film on your fabric and apply heat and pressure with a heat press. Once cooled, peel off the film to reveal your vibrant design.
One of the biggest advantages of DTF transfers is that they work on a wide range of materials, including cotton, polyester, blends, and even treated leather. No need for pre-treatment or special coatings. Plus, the prints are incredibly durable, stretching with the fabric without cracking.
Why Choose DTF Transfers Over Other Methods?
You might be wondering how DTF compares to vinyl, screen printing, or DTG (Direct to Garment). Here's a quick comparison:
- Vinyl: Great for simple designs but limited in color and layering. DTF handles complex, multi-color designs with ease.
- Screen Printing: Cost-effective for large orders but requires setup and is impractical for small batches. DTF is perfect for one-offs and small runs.
- DTG: Works well on cotton but often requires pre-treatment and can be less vibrant on dark shirts. DTF produces vivid colors on any color fabric, no pre-treatment needed.
From my own experience, DTF transfers have been a game-changer for printing on dark polyester jerseys and nylon jackets. The colors pop, and the prints survive countless washes without fading. It's also more forgiving than other methods when it comes to fabric choice.
Essential Equipment for DTF Printing
To get started with DTF transfers, you'll need a few key pieces of equipment. While the initial investment can be significant, it pays off if you're planning to offer custom apparel.
DTF Printer
A dedicated DTF printer uses pigment inks and typically has a white ink channel. Popular models include the Epson F2100 (converted) or purpose-built DTF printers from brands like Vivid. Expect to spend $3,000 to $10,000.
Heat Press
A reliable heat press is crucial for both curing the powder and transferring the design. You'll need one that reaches at least 350°F (177°C) and provides even pressure. A 15x15 inch press is a good starting point.
DTF Film and Powder
Not all films and powders are created equal. Look for high-quality PET film designed for DTF, and a hot-melt adhesive powder that matches your ink type. I recommend testing a few brands to see what works best with your printer.
Design Software
Any graphic design software like Adobe Photoshop, Illustrator, or free alternatives like Inkscape or GIMP will work. Ensure your designs are high-resolution (300 DPI) for best results.
Step-by-Step Guide to Applying DTF Transfers
Once you have your DTF transfer ready (either printed yourself or purchased from a supplier), applying it is a breeze. Follow these steps for a flawless finish:
- Preheat Your Heat Press: Set the temperature to 325-350°F (163-177°C) and preheat for about 15-30 seconds.
- Position the Transfer: Place your garment on the press and position the DTF transfer with the design facing up. Use heat tape if needed to keep it in place.
- Press: Apply medium to firm pressure for 15-20 seconds. If you're using a home iron, press firmly for 30-45 seconds, but a heat press is highly recommended for consistent results.
- Cool and Peel: Allow the transfer to cool completely (about 1-2 minutes) before peeling off the film. Peeling while hot can cause the design to stretch or lift.
- Post-Press (Optional): For extra durability, cover the design with a Teflon sheet or parchment paper and press again for 10 seconds. This further embeds the adhesive.
And that's it! Your custom apparel is ready to wear or sell. With a bit of practice, you'll be able to apply DTF transfers in under a minute per item.
Common DTF Transfer Issues and How to Fix Them
Even with the best equipment, you might run into problems. Here are some common issues and their solutions:
- Design Peeling After Wash: This usually means insufficient pressure or time during application. Increase pressure and ensure you're pressing for the full recommended time. Also, make sure the powder was properly cured.
- Dull or Faded Colors: Under-cured powder can cause colors to look washed out. Ensure the powder is fully melted and glossy before transferring. Also, check your printer's ink settings.
- Film Sticking to the Design: If the film doesn't peel off cleanly, it might be due to insufficient cooling. Let it cool longer. If it still sticks, your powder may be over-cured or the film might be incompatible.
- Cracking: Cracking occurs when the transfer is stretched too much or the fabric is too elastic. DTF transfers are stretchable, but if you're printing on highly elastic fabrics like spandex, consider using a stretch additive or adjusting your design.
I've learned that keeping a log of your settings for different fabrics saves a lot of trial and error. What works for cotton may not work for polyester, so adjust accordingly.
Design Tips for Stunning DTF Transfers
Your design plays a huge role in the final outcome. Here are some tips to make your prints stand out:
- Use High-Resolution Images: Low-res images will look pixelated. Stick to 300 DPI or vector files.
- Add a White Underbase: If printing on dark fabrics, ensure your design includes a white layer behind the colors. Most DTF printers do this automatically, but double-check.
- Mind the Details: Thin lines and small text can get lost. Use bold, simple fonts and avoid overly intricate details.
- Test on Scrap Fabric: Before pressing onto your final garment, do a test press on similar fabric to check colors and adhesion.
One of my favorite projects was a full-color logo on a black polo shirt. The DTF transfer captured every gradient and fine line perfectly, and it felt soft to the touch.
Where to Buy DTF Transfers
If you're not ready to invest in a printer, you can order custom DTF transfers from online services. Many companies will print and ship your transfers, ready to apply. When choosing a supplier, look for:
- Quality: Check reviews and ask for samples.
- Turnaround Time: If you're on a deadline, ensure they can deliver quickly.
- Pricing: Compare costs per transfer, but don't sacrifice quality for price.
- Customer Service: A responsive team can help with any issues.
For those in the US, sites like DTF Transfer Pros and Transfer Express are popular. But always do a test order first to ensure compatibility with your heat press.
Frequently Asked Questions About DTF Transfers
Can I use DTF transfers on 100% polyester?
Yes, DTF transfers work great on polyester. In fact, they often adhere better to polyester than DTG. Just be mindful of the heat settings: polyester can scorch at high temperatures, so use a lower temperature (around 300°F) and test first.
How long do DTF transfers last?
With proper application and care, DTF transfers can last as long as the garment itself. They withstand 50+ washes without fading or cracking. To prolong life, wash inside out in cold water and avoid bleach.
Do I need a special printer for DTF?
You can convert certain inkjet printers (like Epson) to DTF by using DTF ink and a film. However, dedicated DTF printers are more reliable and produce consistent results. If you're serious about DTF, invest in a purpose-built machine.
What's the difference between DTF and DTG?
DTG (Direct to Garment) prints directly onto the fabric, while DTF prints onto a film first and then transfers. DTF works on more fabrics, requires no pre-treatment, and often produces more vibrant colors on dark shirts. DTG is limited mostly to cotton.
Can I stretch DTF transfers?
Yes, DTF transfers are stretchable and flexible. They won't crack when stretched moderately. However, excessive stretching can cause the print to distort, so it's best to avoid over-stretching the fabric during wear.
With this guide, you're well on your way to mastering DTF transfers. Whether you're a hobbyist or a business owner, this technology opens up a world of possibilities for custom apparel. Happy printing!